I have recently become a little obsessed with pork shoulder, which is not something I ever expected to say.
I bought a two-pack and made them both in the Crock-Pot, although not at the same time. I made one and froze the other until I was ready for it. The second one was substantially better than the first. The biggest difference was that I took the time to really sear it in my cast-iron pan before putting it into the Crock-Pot. It added only a few minutes of work, but made enough of a difference that I don’t think I’ll make another one without doing it.
I’ve also realized what a great value pork shoulder is. You get a lot of meat, it freezes exceptionally well, and when I reheat it, it tastes remarkably fresh. If I take a little time when it’s first cooked to prepare and portion it properly, one pork shoulder gives me several really good family meals already waiting in the freezer.
That combination of flavor, usefulness and real-life value fits the way we think about food throughout Family Critic's Cuisine Reviews. A meal does not have to be expensive or complicated to earn a permanent place in the family rotation.
I also have to mention breakfast because it has become one of my favorite parts of making it.
I usually start my pork shoulder before I go to bed. After about 10 hours on LOW, it’s ready in the morning. One of my absolute favorite ways to eat it is warm on really soft, bakery-style white bread spread with butter and finished with a little coarse salt. It’s incredibly simple and so good.

I’m always interested in foods that are a good value, but to me that doesn’t necessarily mean finding the cheapest possible thing to put on the table. I want something that tastes good, that we’ll actually enjoy eating, and ideally something I can use more than one way.
Pork shoulder checks all of those boxes.
It’s generally an inexpensive cut of meat, especially considering how much you get. It also happens to be a cut that benefits tremendously from long, slow cooking.
The freezer factor is another big reason I like it.
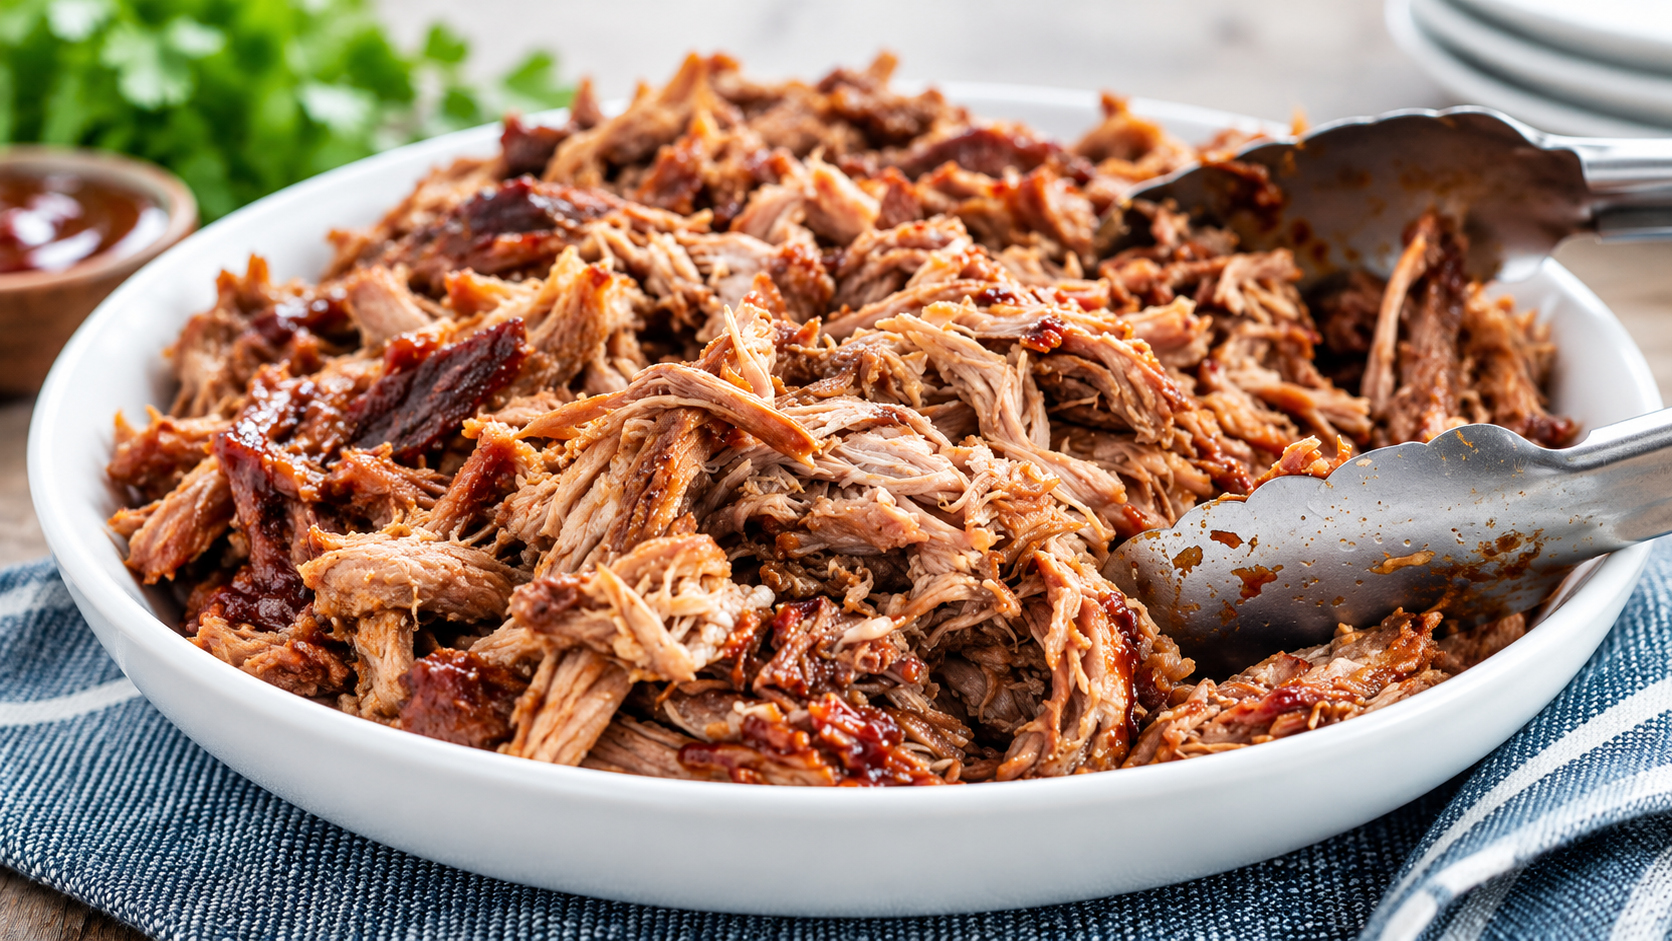
Pulled pork freezes exceptionally well. When I reheat it, I find that it tastes very fresh, which makes cooking a large amount at once actually worthwhile.
We eat some when I first make it, and then I portion the rest into amounts that are about right for one meal for our family. Instead of having a refrigerator full of pork that needs to be eaten over the next several days, I end up with future meals ready whenever I want them.
That is the kind of value I really appreciate. It is also consistent with the broader Family Critic approach to value: not simply paying less, but getting meaningful usefulness and enjoyment from what you buy.
I have always wondered about this.
Obviously a pig has a shoulder, so pork shoulder makes sense. But if pork butt is also pork shoulder, why in the world is it called a butt?
It turns out pork butt doesn’t come from the back of the pig at all.
Both pork butt and picnic shoulder come from the front shoulder area. Boston butt, also called pork butt, comes from the upper portion of the shoulder. Picnic shoulder comes from farther down the shoulder, closer to the front leg.
The National Pork Board's guide to pork shoulder also explains the different names commonly used for shoulder cuts.
Boston butt generally has quite a bit of marbling, which makes it particularly well suited to the long, slow cooking we’re doing here.
The two-pack I bought actually made me more curious about this because the second piece turned out noticeably better than the first. I didn’t pay enough attention to the labels at the time to know whether the two pieces were different shoulder cuts, but I certainly will next time.
If I’m shopping specifically for pork to cook this way, Boston butt is what I’ll look for first.
Technically, you don’t have to.
After making it both ways, though, I absolutely think it’s worth doing.
I season the outside of the pork, put a little avocado oil into my cast-iron pan and heat it over medium-high heat.
Once the pan is hot, I sear the pork for approximately four minutes per side.
I let it get a good, browned exterior rather than just giving it a little color.
You’re not trying to cook the pork through in the cast iron. You’re giving the outside that wonderful seared flavor before the long, slow cooking begins.
The difference was noticeable enough between my first and second pork shoulders that this has become part of the recipe for me.
For a roughly 4- to 6-pound pork shoulder, I use:
Season the pork all over.
Add a little avocado oil to a cast-iron pan and heat it over medium-high heat. Once it’s hot, add the pork and sear it for approximately four minutes per side, getting a nice browned exterior all the way around.
Then transfer the pork directly to the Crock-Pot.
Put the lid on and cook it on LOW for approximately 10 hours.
Cooking time can vary with the size of the roast and the slow cooker, so I prefer to verify doneness with a food thermometer rather than relying on time alone. The USDA food-safety guidance lists 145°F with a three-minute rest as the minimum safe temperature for pork roasts.
For the soft, pull-apart texture I want from pork shoulder, I continue cooking until the meat is very tender and pulls apart easily.

One thing I do differently from a lot of Crock-Pot pork recipes is that I don’t add any liquid.
No broth. No apple juice. No water.
Pork shoulder produces an incredible amount of its own liquid as it cooks. I don’t see a reason to add more simply for the sake of having more liquid in the Crock-Pot.
I’m not trying to waterlog or soak the meat. I want it slowly cooking in the flavorful juices that come naturally from the pork itself.
I don’t add any, but usually once during the 10-hour cooking time, I’ll redistribute the pork’s own juices a little.
Sometimes I simply give the Crock-Pot a gentle tilt from side to side and front to back so the liquid moves around the meat.
Other times, I’ll open the lid and use a ladle to spoon some of the accumulated juices over the top.
You can also use a large pair of tongs and carefully turn the pork over once.
This is not a necessary step. The pork can cook perfectly well without you fussing with it. It’s just something I usually do once during the cooking time if I’m awake and nearby.
I’m taking all of those wonderful juices the pork has created and getting them back around or over the meat rather than adding another liquid.
Since I usually start my pork shoulder before bed, I’m certainly not getting up throughout the night to tend to it. The whole point is to let the Crock-Pot do the work.
Starting pork shoulder before bed has become my favorite way to make it.
I do the little bit of active work at night: season it, sear it and put it into the Crock-Pot. Then I go to bed.
I cook mine on LOW for approximately 10 hours, so by morning it’s ready.
The National Pork Board also identifies slow cooking as one of the classic methods for pork shoulder. Cooking time will vary depending on the size of the shoulder and the slow cooker.
There is something pretty great about waking up and realizing you’ve already cooked a huge amount of food for your family before the day has even really started.
It also gives me an excuse to eat pulled pork for breakfast.
After we’ve eaten some of the pork fresh, I deal with the rest.
This is probably the most time-consuming part of the whole process.
I don’t just shred absolutely everything together.
I use two forks, or sometimes a fork and a pair of tongs, and carefully go through the pork. I separate all of that beautiful, tender meat from the larger pieces of fat, connective tissue and anything else I wouldn’t want to encounter in the middle of a bite.

I think this makes an enormous difference.
We’ve probably all had pulled pork where one bite is wonderful and then the next contains a big piece of fat or something with an unpleasant texture. When I’m making it at home, I have the opportunity to prevent that.
So I take the time to do it thoroughly.
It isn’t the fastest part of making pulled pork, but it’s completely worth it. When I’m finished, everything I’m putting into our freezer containers is meat we actually want to eat.
In our house, some of the appropriate scraps can go to our cat or chickens rather than automatically going into the trash, too.
There’s very little waste, and the pork I’ve saved for us is exactly how I want it.
This may be one of the biggest reasons I’ve become such a fan of pork shoulder.
Once I’ve gone through all of the meat, I don’t put it into one enormous freezer container.
I divide it according to how much our family would realistically eat for one meal.
That’s the key for me.
When I decide I want carnitas, I want to reach into the freezer and pull out one portion of pork. I don’t want to thaw a huge container and then have another batch of leftovers to deal with.
I also freeze the pork plain rather than adding barbecue sauce or turning it into a particular recipe first. That keeps all of my options open.

The USDA guidance for leftovers recommends cooling leftovers promptly, storing them in sealed containers and freezing portions you will not use soon.
USDA guidance says cooked leftovers generally maintain their best quality for about three to four months in the freezer.
Unlike some foods that are never quite the same after they’ve been frozen, pulled pork reheats beautifully. Mine tastes remarkably fresh after reheating, which is why I think it’s such a worthwhile meat to cook in quantity.
For food safety, USDA recommends reheating leftovers to 165°F.
I’ve done the work once, but I’m going to benefit from it several more times.
Part of the reason I like freezing the pork plain is that I don’t have to decide what all of it is going to become when I first make it. I can pull out one meal-size portion and season or sauce it depending on what we want that day.
These are three of my favorite ways to use it.
This may be the easiest dinner of all.
I reheat a portion of the pulled pork, add barbecue sauce and serve it on soft buns. You could certainly add coleslaw or whatever else your family likes, but it doesn’t need much.

This is also exactly why I don’t add barbecue sauce before freezing the pork. I can turn one container into barbecue pork without committing everything else in my freezer to the same flavor.
If hearty family comfort food is your thing, you may also enjoy our Lodge Wood Fired Grill review.
This is probably the simplest way I eat it, and honestly one of my favorites.
Because I usually start the pork shoulder before bed, it’s ready in the morning. I put some of the warm pork on soft, bakery-style white bread spread with butter, then sprinkle a little coarse salt over the top.
That’s the whole thing.
The pork is warm, the butter melts into the soft bread, and the little bit of coarse salt is just enough. It may not be a conventional breakfast, but it’s one of the things I look forward to when I make pork shoulder.
I am very particular about bread texture in a sandwich, which is something that also comes up in our Bottom Line Bakery & Café review. For this pulled pork breakfast, genuinely soft bread is part of what makes the simplicity work.
This is another reason the frozen portions are so useful.
I thaw a portion of pulled pork and reheat it in a pan with a little carnitas seasoning. I let it cook long enough that some of the moisture cooks away and the pork starts to dry out and crisp a little around the edges.
I’m not making traditional carnitas from scratch here. This is simply a very easy way to take the pulled pork I’ve already made and give it a completely different flavor and texture.
Once some of those edges have crisped, it’s ready for tortillas and whatever toppings we want.

If tacos are already popular in your house, our Taco Madre review is another place to find a little inspiration for flavors and toppings.
The nice thing about all three of these is that the pork itself stays the same when I freeze it. I do the long cooking and the careful sorting once, freeze it in portions, and decide what each portion will become when I’m ready to use it.
There really isn’t anything complicated about this recipe. Most of what I’ve learned has been about taking a few simple steps and doing them well.
I bought a two-pack of pork shoulder without realizing I was going to have this many opinions about it.
By the time I cooked the second one, though, I had figured out a few things that made it substantially better than the first. Now I’m actually looking forward to buying another one and seeing what else we can make with it.
When I buy a two-pack, I generally make one pork shoulder and freeze the other one uncooked until I’m ready for it. Then, once I cook a shoulder, I portion the finished pulled pork into meal-size amounts and freeze those too. It gives me the convenience of buying the larger package without feeling like we suddenly have to eat an enormous amount of pork.
There is a lot to like about a cut of meat that is relatively inexpensive, feeds your family well when you first make it, freezes beautifully, and leaves you with several future meals that heat up tasting wonderfully fresh.
That’s the kind of value I appreciate. It’s not simply about finding the lowest price at the grocery store. It’s about what I can do with what I buy, how much we enjoy it, how little we waste and how useful it continues to be after the first meal.
That practical, real-life perspective is at the heart of Family Critic, whether we are talking about food we make at home or meals we try when we are out.
Pork shoulder has definitely earned a place in our regular meal rotation. I like having the second shoulder from a two-pack in the freezer, and I especially like having meal-size portions of cooked pork ready to pull out later.
Between barbecue sandwiches, easy carnitas and my very simple breakfast of warm pork on buttered white bread with coarse salt, none of it has a hard time getting eaten.
If you enjoy practical ideas that make family life easier, Family Critic is part of a broader collection of resources focused on helping families grow, organize and make everyday life work better.
Here They Grow explores children, learning, family rhythms and the small choices that help young people become confident and capable.
Efficiency Plan focuses on practical systems, organization, responsibility and making everyday work and home life easier to manage.
For the roughly 4- to 6-pound pork shoulders I make, approximately 10 hours on LOW has worked well. Slow cookers and cuts of meat vary, so use tenderness and a food thermometer rather than cooking time alone to determine when the pork is ready.
I do not add broth, water or juice. Pork shoulder releases a substantial amount of its own juices during the long cooking process, and I prefer letting the meat cook in those flavorful juices.
You can make pulled pork without searing it first, but after trying it both ways I strongly prefer the seared version. I sear mine for approximately four minutes per side in avocado oil before transferring it to the Crock-Pot.
Pork butt, or Boston butt, comes from the upper part of the pig's shoulder. Picnic shoulder comes from lower on the shoulder toward the front leg. Both work with slow cooking, while Boston butt is particularly popular for pulled pork because of its marbling.
I separate the finished meat carefully, divide it into meal-size portions and freeze it plain in sealed containers. Leaving the pork unsauced means one portion can later become barbecue sandwiches, carnitas or something entirely different.
USDA guidance says cooked leftovers generally maintain their best quality for about three to four months in the freezer. Airtight packaging helps protect moisture and flavor.
USDA recommends reheating leftovers to an internal temperature of 165°F.
Some of my easiest options are barbecue pulled pork sandwiches, warm pork on buttered soft white bread, and quick carnitas-style pork crisped in a pan and served in tortillas. Freezing the meat plain gives you much more flexibility later.